Who doesn't love a Christmas Quilt. I have them draped on my couches for the holiday season for us to snuggle under while we watch the classics on the telly.
I wanted to make a super big quilt. I have four kids and we like to be toasty under a quilt while we are watching TV. Though in all fairness my teenagers are less likely to do that these days 😢.
I wanted something a little less traditional and something with bright fun colours.
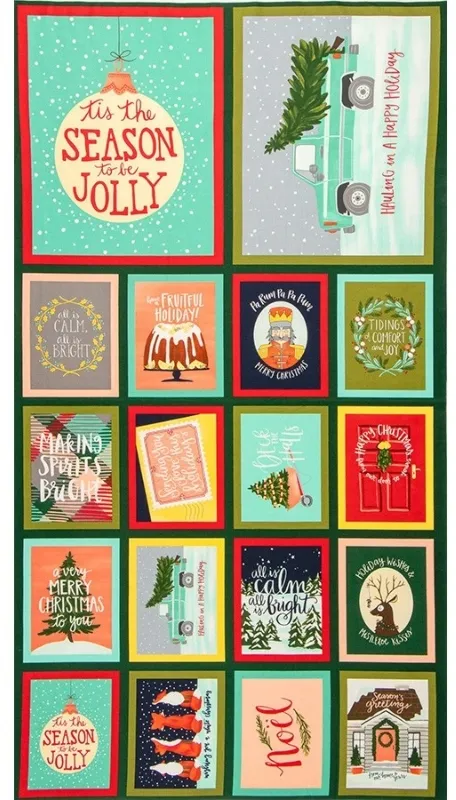
So when our Moda Fabrics rep came and showed us the Moda Fabrics To Be Jolly Christmas Panel I loved it so much I just went and bought 42 of the panel for the shop and I decided there and then to base my quilt around that. The colours are so vibrant and the imagery is so sweet with just the right amount of modern while still having elements of traditional.
So in other words the perfect base to design my quilt around.
I'll be perfectly honest, like most things in my life, I had no big advanced plan and so no carefully calculated measurements or drawings.
I just literally made it up as I went along. And this is the quilting journey I took.
Just to pop an FYI in here, if you bought a kit off us to make this quilt, you should have the following fabrics
(fabrics may differ from images shown).
One x To Be Jolly Christmas Panel
Fifteen x 5.5" Stripes (to be cross cut into many many 2.5" squares)
One x 54" Piece of Plain Warm White Fabric
One x 32" Piece of Red Fabric for Inner Borders and Binding
One x 54" Piece of Patterned Fabric for Outer Borders
Instructions
1/4" seams are used throughout.
Basic patchwork and quilting skills are assumed.
First off, I cut the panel images apart by cutting a 1/4" away from the border on each one.

Then I bordered each panel with Kona Snow (the "warm white" coloured fabric in your kit).
I worked on bordering the smaller images first.
I did this by cutting 2" WOF strips and attaching them to the longer sides of the smaller images ie the foxes, nutcracker etc and then I cut 2.25" WOF stripes and added these strips to the remaining sides. So these smaller panels were sized up to 8.5" x 10.5" including seam allowances when finished.
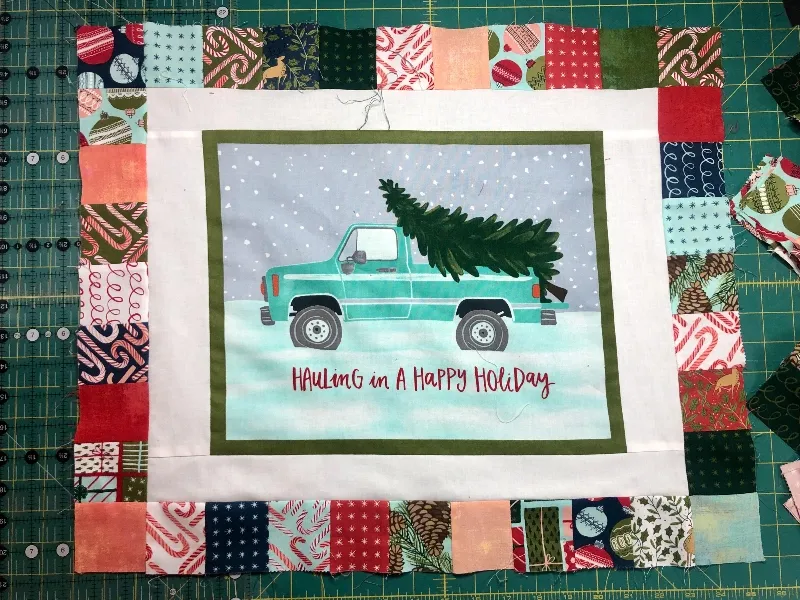
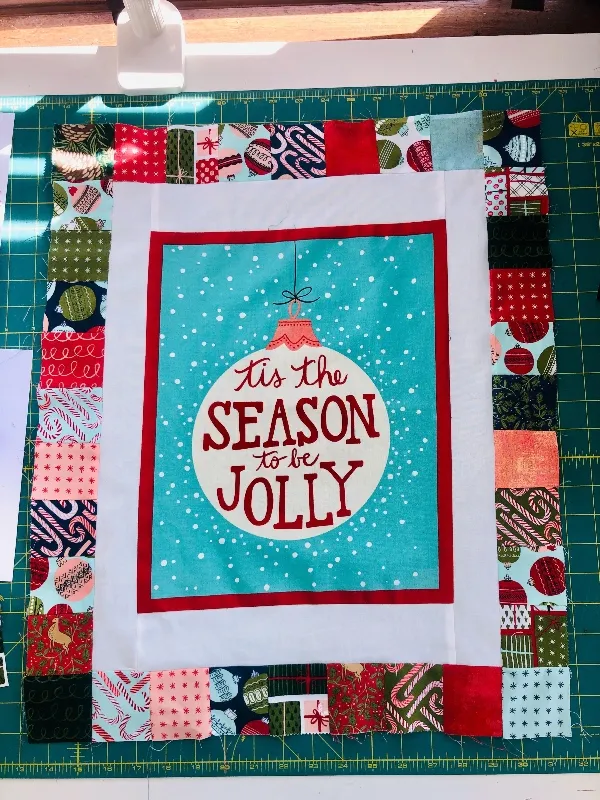
Then to border the two bigger images, I cut 2.5" WOF strips and attached them to the shorter sides first and then added 2" cut strips to the remaining longer sides (I think I used some leftover strips from the previous steps here, by trimming it down to 2") so these were sized up to 14.5" x 18.5" including seam allowances when finished.
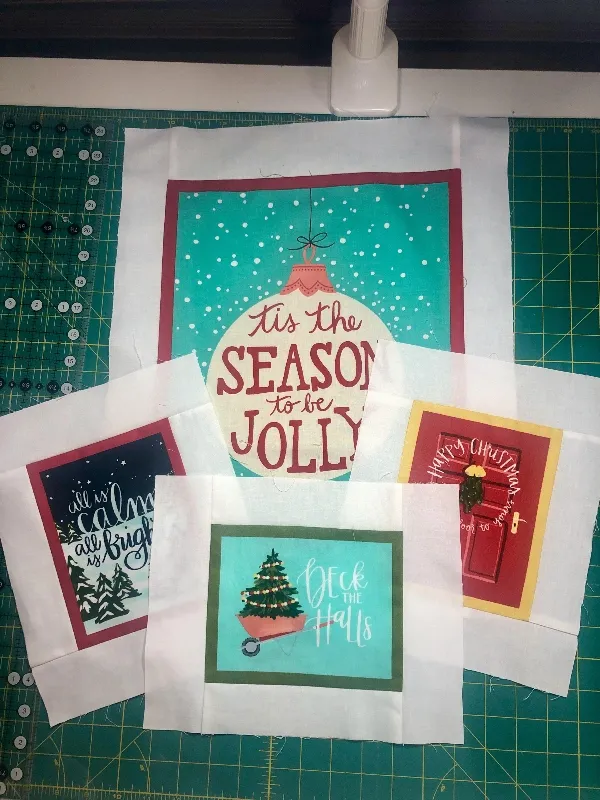
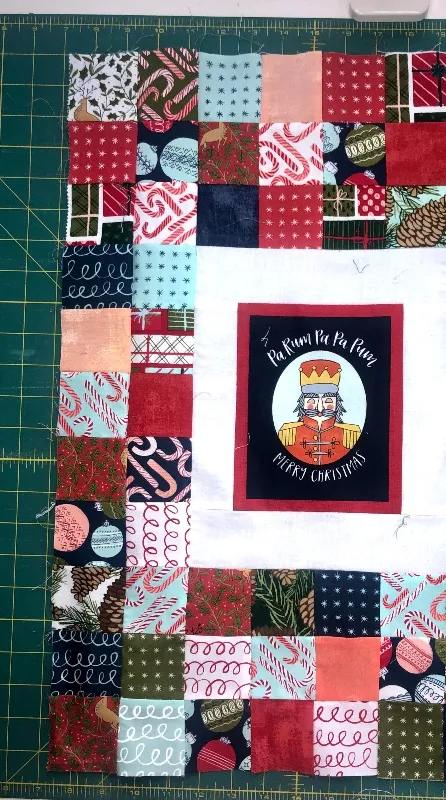
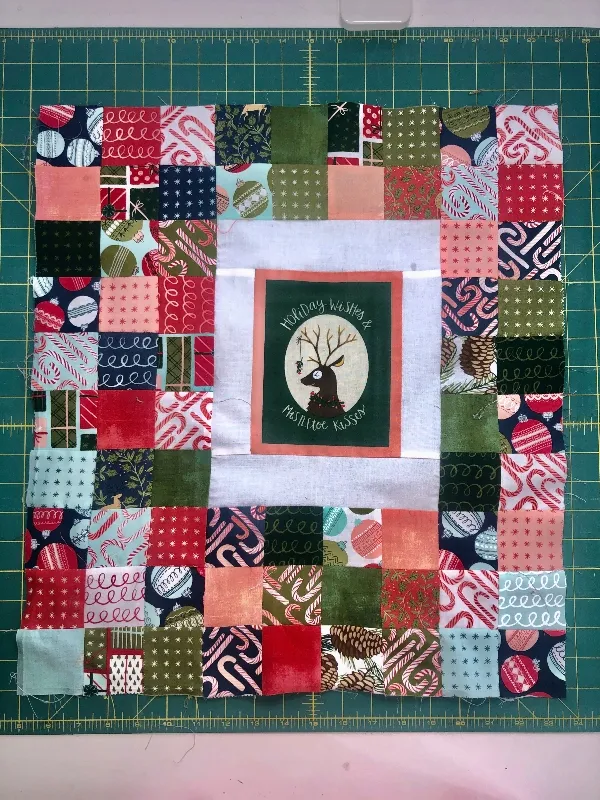
Here is a sample picture of what the bordered panels should look like.
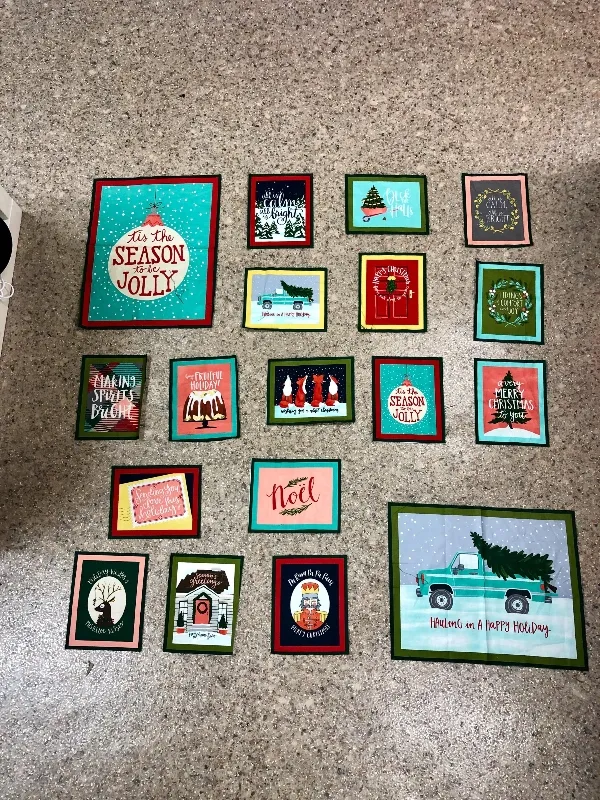
Then I started to hatch a plan about bordering each panelled piece with 2.5" squares. I had a loose plan in my mind about how I would lay them out in the quilt. See image below. I didn't stick rigidly to this..........that is typical of me 😀. But this was my starting point.
I started with bordering the bigger images first. You will need seventy two 2.5" squares for this (excuse the unclipped threads in my image 🙈)
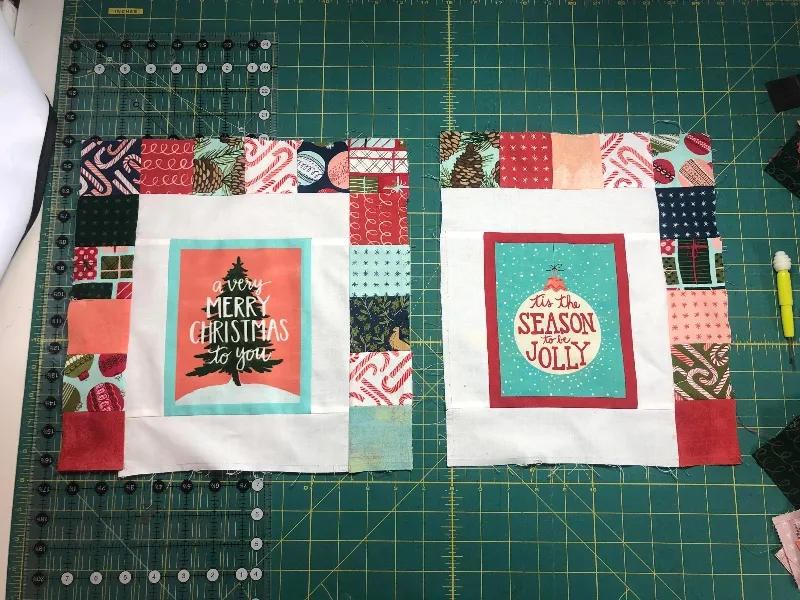
Then I actually worked from right to left because when I looked at my original layout, the six smaller panels on that side, were all the same size and direction. So that seemed the easiest place to start.
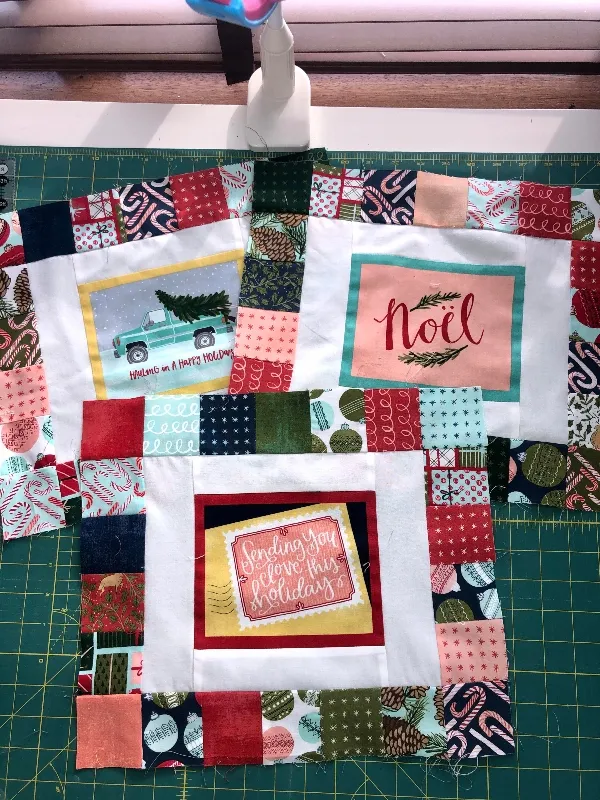
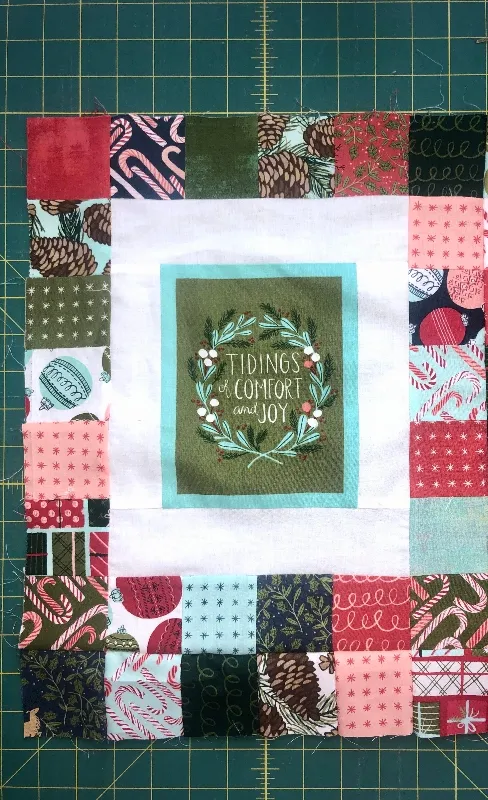
So I took the six smaller images and I bordered them with squares as per the detailed images below. You should need eighty nine 2.5" squares to complete this section.
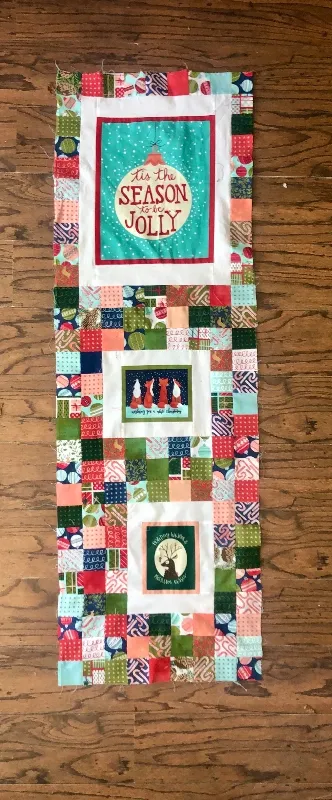
Then I joined these subsections up to create one long panelled piece as per the image below.
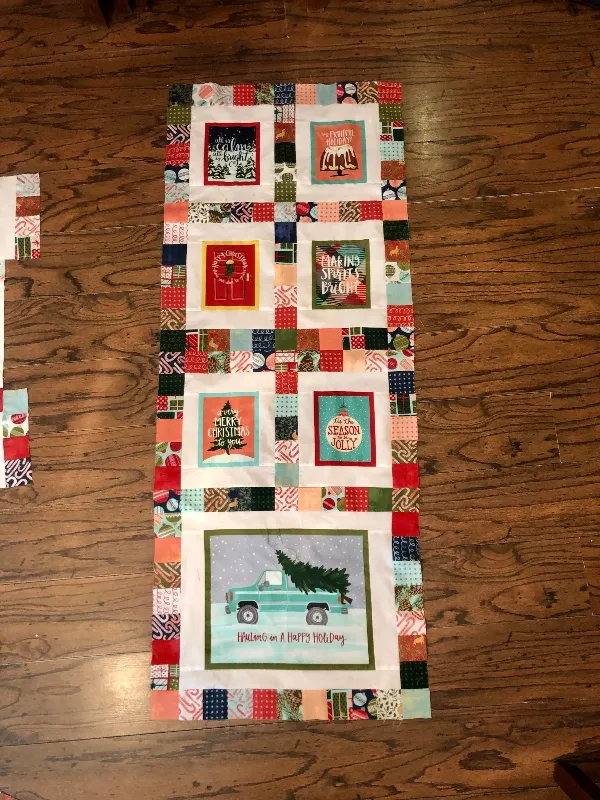
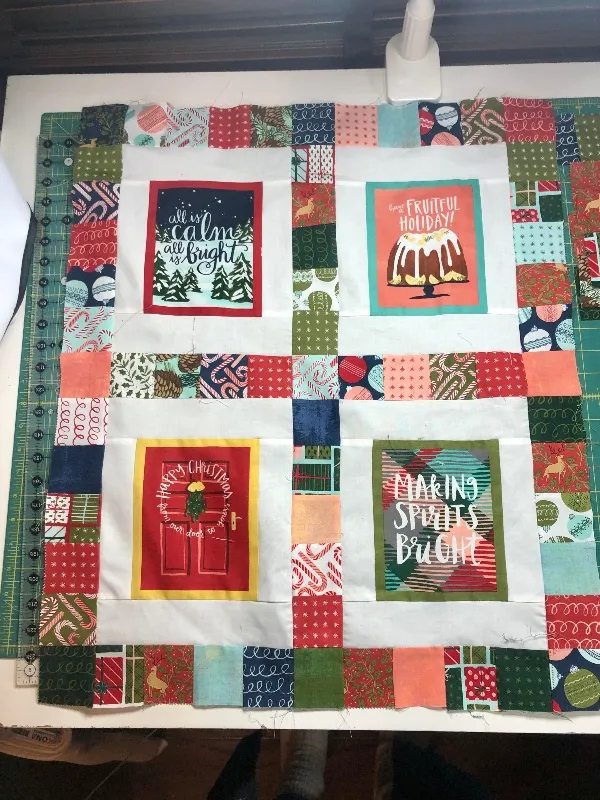
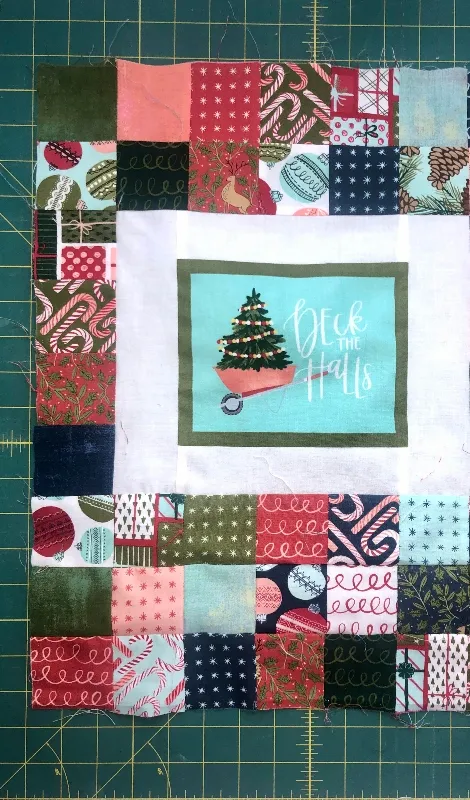
Then I worked one of centre panelled pieces. Using the images below, I bordered the following pieces using ninety six 2.5" squares.
I joined those subsections together to create a centre panelled piece.
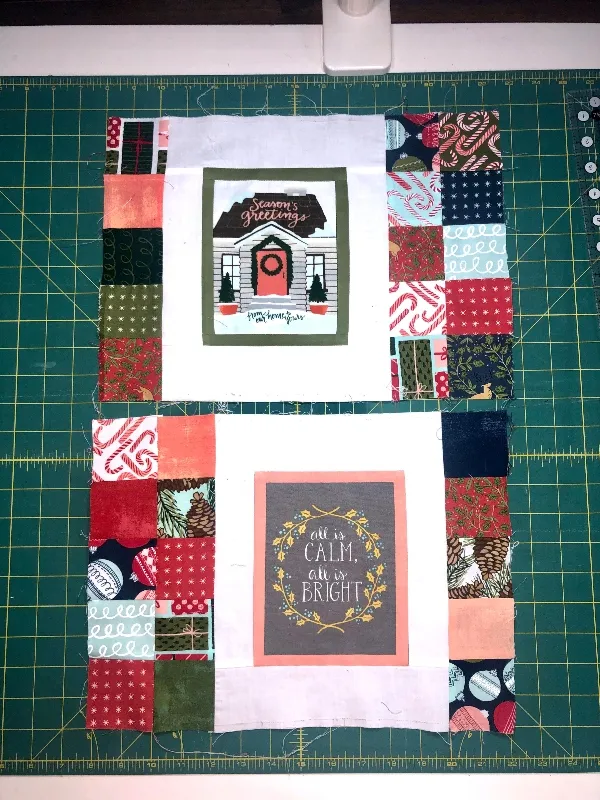
Then I worked on the panels below filling in gaps and bordering with one hundred and eight 2.5" squares
I then joined those subsections to create another long panel.

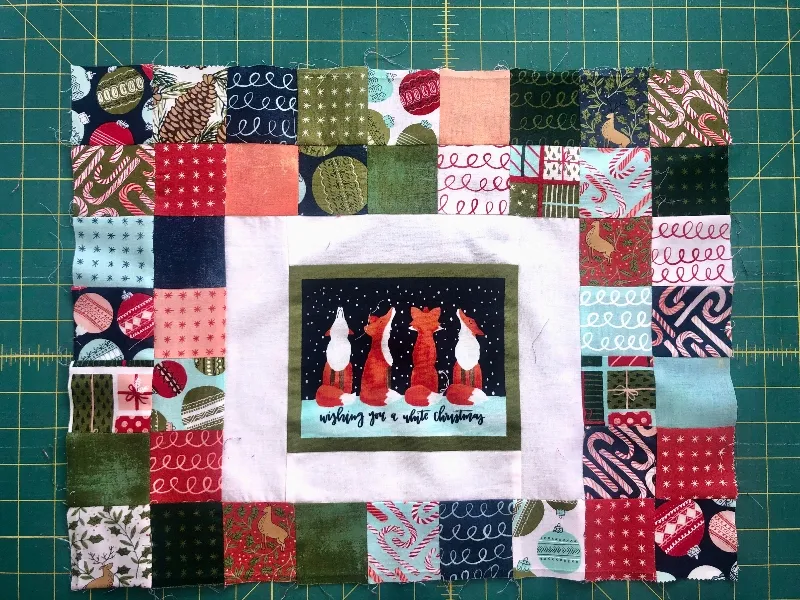
Then it was time to create the final panel, using the last few panel pieces. We had already bordered the bigger "tis the season" panel piece from the beginning so there was just the foxes and the stag to finish.
To finish these off I used one hundred and thirteen 2.5" squares in around as borders and other spaces and gaps that needed filling up.
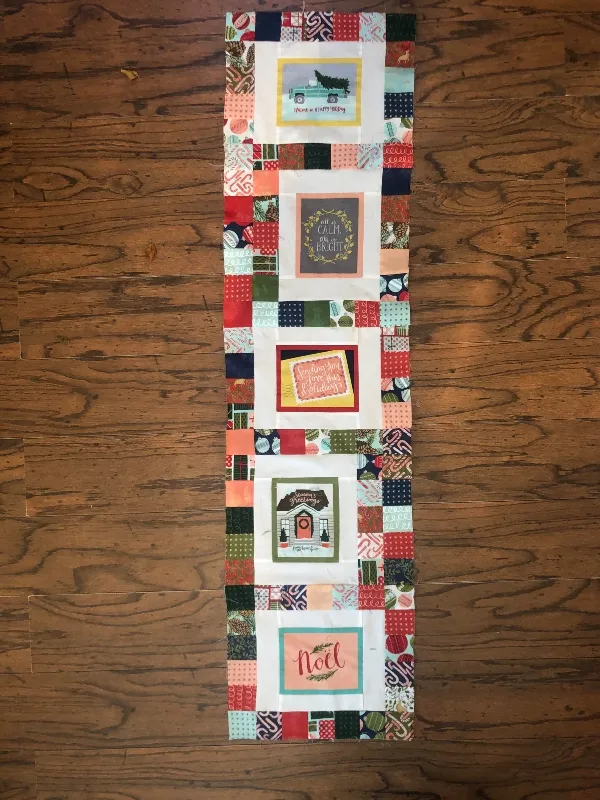
I then joined those subsections up to create the final long panel.
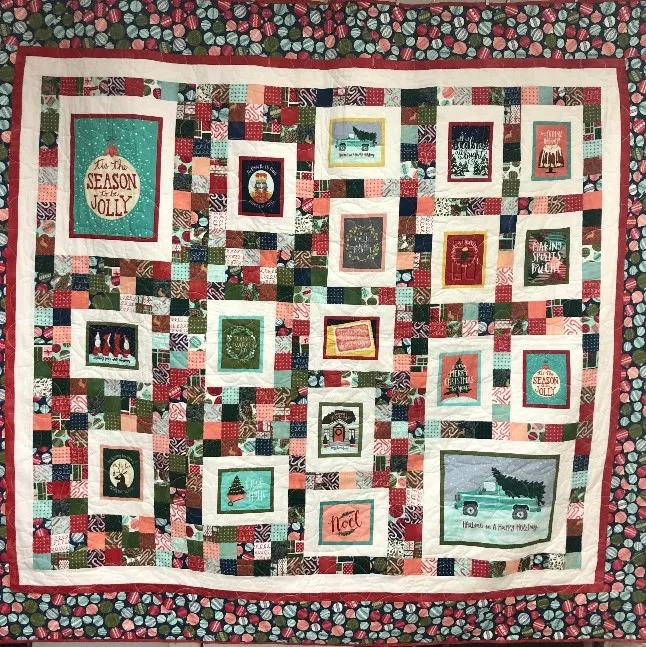
I then joined all those long panels to create the quilt top. I'm really sorry I forgot to photograph that step but I'm hoping from the final image below you will be able to figure it out 🤞🏻
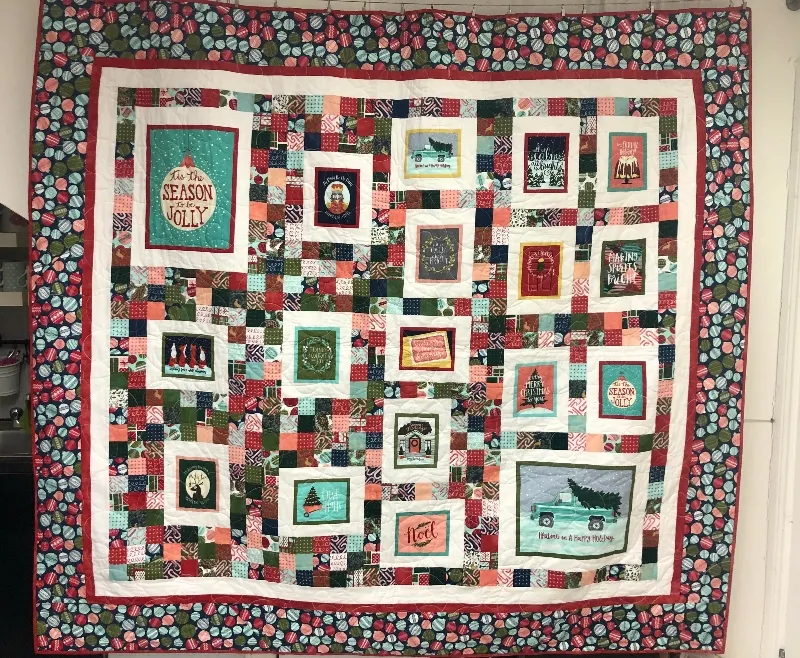
For the borders, join your strips and cut to the required length. I cut 2.5" wide strips for the warm white border, I cut 1.5" wide strips for the red skinny border and then I finally cut 6.5" wide strips for the outer border.
Quilt, bind, enjoy!.....................I can not wait to snuggle under this x
Happy Stitching